Estes Park Light and Power Goes Above and Beyond to Deploy Fiber for Their Customers —
Estes Park Light and Power, located in the Rocky Mountains of Colorado, currently serves 11,000 customers within 350 square miles of rugged terrain. And while Estes Park Light and Power were initially working on a Smart Grid upgrade, we are now deploying fiber to bring broadband to the Town of Estes Park.
Why is a power company deploying aerial fiber, you ask? Because, over the last several years, the community reached out to several major broadband providers. However, it was unable to secure the interest of a traditional telecom because of the low return on investment due to our rural population base.
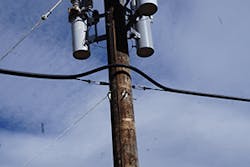
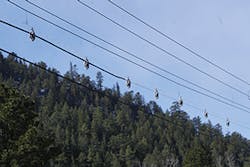
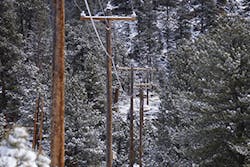
Estes Park Light and Power used pull tape to temporarily string the pulley guides in place. The pulley guides control the route for the FuturePath Figure-8 Self-Support Aerial conduit as it is being installed. Pole line hardware will be used to attach the conduit to the utility poles and upon completion, the pull tape and guides will be taken down. As an added safety benefit, the product cleans up the pole so that linemen have fewer things they must climb over. The pulley guides are typically used only when crossing a road (or river) in order to guide the product without having to stop traffic. Most installers (although a few do) do not use the guides for the entire route.
However, a survey done by Colorado State University showed that the residents preferred to buy high speed Internet from Estes Park Light and Power instead of from a traditional telecom company, primarily because of the established reputation for response time during power outages. Therefore, we entered the telecom biz.
That was no easy feat, given the terrain we cover. In addition to facing extreme changes in levels of elevation and harsh winter weather conditions, the installation route we used crosses both a river and a highway 4 or 5 times each. What’s more, only 40% of the poles can be reached by a bucket truck. Most, in fact are on the side of a mountain, so, our linemen must be the best. And they are the best, due to the on-going training we provide with our vendor partners.
InvisiLight® Solution for Deploying Fiber
April 2, 2022Go to Market Faster. Speed up Network Deployment
April 2, 2022Episode 10: Fiber Optic Closure Specs Explained…
April 1, 2022Food for Thought from Our 2022 ICT Visionaries
April 1, 2022Fiber to the Mountain
The traditional cost of using a contractor to install aerial fiber in these conditions would have cost $18 per foot. Instead, we decided to do it in-house at about $7 per foot. That offers potential savings of about $3 or $4 million on man hours, and that’s a big deal.
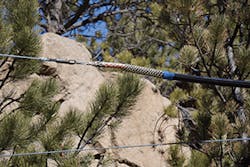
Similar to the novelty toy the Chinese finger trap, the wire mesh of the Kellems Grip keeps the equipment securely connected to the break-away swivel as the conduit is being pulled through the temporary pulley guides. One of the appealing features of the conduit is that it is installed in the same manner as any Figure-8 conduit or cable. Lockhart said, "It’s a little easier than installing the powerline because the powerline is hot. Our crews already know how to pull in the powerlines; this is about the same thing. It only took them 20 minutes to figure out how to pull in the conduit and attach it to a pole."
That’s why we decided to swap traditional loose tube cables and standard ducts for miniaturized micro cables and microducts. We learned that micro cables are miniaturized stranded loose tube cables. Miniaturization is achieved through a reduction in buffer tube diameter and a thinner outer jacket. The buffer tubes still do contain the typical 12 colored optical fibers, and maintain their SZ stranding.
Even though they are functionally equivalent, we realized micro cables are less rugged than traditional loose tube cables. For this reason, a micro cable is typically installed in a microduct: a miniaturized plastic conduit which can be used to subdivide internal duct space into smaller compartments.
We chose Dura-Line’s FuturePath because it had 7 pathways inside of 1 conduit. So instead of spending a lot of man hours to keep running fiber from pole to pole, we could push fiber through faster and easier.
As you can imagine, installing fiber is a little easier than installing the powerline because the powerline is hot. Since our crews know how to pull in the powerlines, it took about 20 minutes for them to figure out how to pull in the cable and attach it to a pole.
Aerial Installation Tips
As long as there have been telephone poles, there have been cables attached to them. And while our linemen are experts, our vendor partner helped train them to use these 5 best practices.
Best Practice 1.
Verify the span and maximum sag allowances to determine the point of attachment on the pole.
From the ground, typically, a communications line is attached between 18 and 22 feet, but it could go higher if there’s enough room on the pole. Communications companies give at least a 40-inch allowance away from powerlines.
Generally, poles are placed 150 to 200 feet apart and the tension on the line is between 1,500 and 2,500 lbs. The product has been product tested to support up to 6,500 lbs. of linear tension. Dura-Line has accounted for rain, wind, and ice loading, as well as a certain amount of sag between poles. The product supports against water migration and freezing. In addition to installing a test track at the Clinton, Tenn., manufacturing plant, the Company supports the product with rigorous testing, customer training, and installation support. Some customers prefer the traditional strand and lash technique because of the equipment and resources already in place, which also works for the product.
Best Practice 2.
Pull the HDPE product off the reel from the top to avoid reverse bending.
Most installers are experienced at pulling conduit into a trench, where best practices dictate that the duct flows off the bottom of the reel for an underground installation. However, for an aerial installation, the product needs to flow off the top of the reel to follow the memory of an HDPE product coming off a reel.
Best Practice 3.
Insure the correct materials and tools are available.
These include chain hoist, rollers and guides for crossing roads or rivers, tensiometer, and a serpentine grip for grabbing and tensioning the messenger.
Best Practice 4.
Preinstall the pole hardware.
Long lengths of cable can be installed in a short period of time when installers add all of the hardware at the beginning of the process and then pull in the conduit. After the hardware is in place, the duct is tensioned and attached. Tensioning the strand at each pole will provide the initial sag needed and clearance requirements. Use a serpentine and chain hoist to tension the strand. A tension meter is suggested to verify proper strand tensioning.
If ice and wind loading will be a factor in the region of installation, pay attention to sag tension. Attach to the pole hardware previously installed. If obstacles exist along the route, cable rollers attached to other strand structures can help keep the product elevated during the pullout procedure.
Best Practice 5.
Bond the strand per any local requirements.
Metal objects on a pole are subject to lightning strikes and power surges. Bonding and grounding protects workers and ground personnel from danger.

